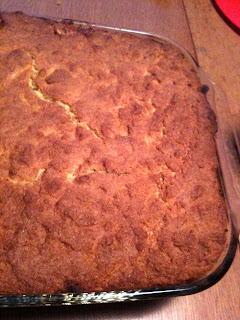
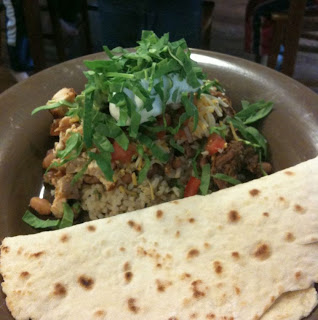
I can't believe I haven't blogged about this recipe yet. I made it months ago with my best friend and cooking buddy, Debe. I guess maybe it was a bit hectic since her daughter broke her arm that day while we were cooking and had to be rushed to the ER. I'm going with that excuse.
Photo from marksdailyapple.com
But really, there is no valid excuse. This pulled pork was amazingly good and super simple. Even my very picky eaters loved it and kept asking for more for days. This was the first time I'd cooked a pork shoulder and we actually finished it before it went bad in the fridge or freezer, and Eric, my wonderful husband, was out of town on a business trip. So it was just the kids and me inhaling an 8lb pork shoulder.
The recipe calls for a 4lb pork shoulder roast, but I could only find the big 8-pounders. So I doubled the recipe and hoped for the best. I forgot the lime juice, but it still turned out very tasty. The only hiccup that I had was that the roast wasn't getting tender and fall-y apart-y in the oven. After about 4 hours in the oven, I decided that it was time to put it in the crock pot. I left it to cook overnight on low and woke up to a tender, juicy, easily shredded, super garlicky pulled pork.
I think that I'll make this pulled pork again this weekend. I've had a difficult time getting enough protein in my diet. With this on hand, I doubt that will be a problem for the next week or so. The more likely problem will be keeping myself from eating a whole pound of it in one sitting.
Thursday, November 10, 2011
Friday, October 14, 2011
Christmas Knitting Has Begun!
A few weeks ago, I received a box of yarn I ordered from knitpicks.com. It was full of Wool of the Andes, a beautiful, worsted-weight, wool yarn, in a gorgeous evergreen color. This was the yarn that I had ordered for a sweater for my brother. With how crazy life has been the past few months, I missed his birthday. So I decided to make up for it with a hand-knit sweater for Christmas this year. I hadn't had the box opened for an hour before I had cast on for my gauge swatch. I love Love LOVE this yarn. It's beautiful, it's fairly soft for wool and it knits up into a wonderful fabric.
I chose this pattern to use, with the help of my sister, Suzy. She's the fashionable one in the family. I, however, was known for wearing turtlenecks under my sundresses as a child. I rely heavily on Suzy's opinion when it comes to clothes, especially when knitting for other people.
The sweater pattern is beautiful and very simple, a basic all-over rib pattern with minimal shaping at the underarms. This one is really knitting up quickly. I love that. I love the instant gratification of knitting with heavier yarns. And I just love the color. I really hope Aaron (my brother) likes it and will wear it. Because even though this pattern is quick to knit, knitting a sweater for someone really is a labor of love. Yes, Aaron, that means I love you.
I'll post pictures as I go along.
Saturday, October 8, 2011
I'm A Slacker and I Love Pumpkin Muffins
It's been over a month since I've posted anything new. What a slacker! Well I'm here to change that now. I have been in love with pumpkin lately. I'm talking big love. It seems to hit me every year about the same time the weather starts turning cooler. Very appropriate, since this is when pumpkins are ready for harvesting.
My last recipe was a pumpkin bread and this one is similar, but different. I was skeptical about this recipe before I made it, but my whole family loves it. I had never considered baking with protein powder, but it works really well. The recipe can be a bit involved, but it is worth it. I'd post a picture, but they disappear too fast for me to snap one. I'll just have to make them again when no one else is around and hope I can get a picture before I eat them all.
Pumpkin Protein Muffins
1 c pumpkin puree
1 1/2 c almond flour
1 tsp baking powder
1 tsp baking soda
2 tsp pumpkin pie spice
1/2 tsp cinnamon
1/4 c whey protein isolate powder
2 Tbsp coconut flour
3 eggs
1/4 c honey or maple syrup
2 tsp vanilla
Pecans
Preheat oven to 350 degrees F. Grease muffin tin.
In a small pan, cook down the pumpkin over medium heat, stirring frequently, for 10 minutes. This concentrates the pumpkin flavor. If you want to skip this step, cut the amount of pumpkin back to 3/4 cup. Set aside to cool.
When oven is hot, toast pecans for 7-10 minutes, or until fragrant, stirring once. Set aside to cool. When they have cooled, coarsely chop them.
In a medium bowl, whisk together all dry ingredients.
In large bowl, whisk together eggs, honey or syrup and vanilla. When pumpkin is cool, whisk it into the egg mixture. Fold dry ingredients into pumpkin mixture.
Using a spring-loaded ice cream scoop, fill the muffin tin. Sprinkle pecans on the top of each muffin.
Bake for 25 minutes.
These are great with the cream cheese frosting I posted with the Pumpkin Pie Bread and a few extra pecans. Enjoy!
Wednesday, September 7, 2011
Pumpkin Pie Bread
It's September, school has started and even though fall hasn't officially started yet, the weather here has turned cooler. And cooler weather makes me want fall-type foods like pumpkin pie or pumpkin bread. So I made something that turned out to be kind of a hybrid. The recipe I used called it bread, but the middle, even when fully baked, was still a bit creamy like pie filling. It was amazingly delicious. I've made it twice in the past couple weeks and it disappeared pretty quickly both times. The second time, I made some spiced maple cream cheese frosting to go on top and we sprinkled toasted pecans on the top as well.
Pumpkin Pie Bread
1/3 c coconut oil
1/4 c maple syrup
1/4 c honey
4 tsp xylitol
1 1/2 c pumpkin puree
2 eggs
1 tsp vanilla
1/4 c coconut flour
1 c almond flour
1 tsp baking powder
3/4 tsp baking soda
1/4 tsp salt
2 tsp pumpkin pie spice
1/2 tsp cinnamon
Preheat oven to 350 degrees F. Grease an 8x8 pan.
In a medium sauce pan over medium heat, cook down the pumpkin 10 minutes, stirring occasionally. (This is to remove some of the liquid and concentrate the flavor.) Transfer pumpkin to large bowl to cool. Stir oil, maple syrup, honey and xylitol into pumpkin. Once pumpkin has cooled to just warm, whisk in eggs and vanilla.
In a medium bowl, whisk together all dry ingredients. Dump over pumpkin mixture and stir together.
Pour into greased pan. Bake 45-60 minutes, or until toothpick comes out fairly clean.
Allow to cool.
Cream Cheese Frosting
8 oz cream cheese, softened
3 Tbsp maple syrup, or more to taste
1/2 tsp cinnamon or pumpkin pie spice
Cream all ingredients together and dollop on top of pumpkin bread.
Monday, August 1, 2011
Not-At-All-Primal-By-Any-Stretch-Of-The-Imagination Tamale Pie
I know that this recipe isn't Primal, at all. But I had this post saved and forgot to post it back in April. This dish is amazingly tasty. It is one that I will definitely be missing. I haven't figured out how to make it primal, but I'll post any progress I make with it. Until then, my non-primal friends, enjoy this one for me.
Tamale Pie
Filling:
2 tsp oil
1 1/2 lbs ground beef
1 large onion, minced
1 medium jalapeno, minced
1 Tbsp tomato paste
4 cloves garlic, minced
2 Tbsp chili powder
1 tsp cumin
1/4 tsp cayenne pepper
1 tsp dried oregano
28 oz can petite diced tomaoes
14 oz can black beans, drained & rinsed
1 1/2 c frozen corn
2 c shredded cheese, either cheddar or jack
1/4 c cilantro
salt & pepper
Cornbread Topping:
1 1/2 c flour
1 c corn meal
2 tsp baking powder
3/4 tsp salt
6 Tbsp sugar
1 c buttermilk or sour milk
8 Tbsp butter, melted and cooled
2 eggs
Heat oil in large skillet over med-high. Brown beef, breaking into small pieces for 5 minutes. Add onion, jalapeno and 1 tsp salt and cook 5-10 minutes or until softened. Add tomato paste through oregano, cook 30 seconds. Add tomatoes and beans. Bring to simmer and scrape bottom of pan to remove brown bits. Add corn and warm through. Remove from heat and add cheese and cilantro. Season to taste with salt and pepper. Pour into 9 x 13 pan and smooth surface.
Make cornbread topping:
Sift dry ingredients together into large bowl. Mix wet ingredients in medium bowl. Pour wet mixture over dry mixture and stir with rubber spatula until just combined.
Pour over beef mixture, smooth top and bake at 375 degrees for 45 minutes. Serve with salsa, sour cream, guacamole and extra jalapenos and cilantro.
Sunday, July 31, 2011
A Not-So-Primal Evening
My friend, Debe, likes to go up to Nova Scotia every year for their blueberry festival. She's been going for years, but couldn't go this year. So she invited a bunch of friends to her house for her own blueberry festival. Everyone brought meat for the grill and something with blueberries in it. Everything was SO good. I know that almost everything had sugar and/or wheat in it, but I couldn't resist. I love blueberries and just had to try it.
But first things first, we brought a couple t-bone steaks and some kabobs for the grill. We picked up half of our 1/2 cow order a week or so ago and we wanted to try some of it. All we used for seasoning was Montreal Steak Seasoning. The kabobs had beef, red onion and red bell pepper and the steak seasoning. They were all so good. The meat really tasted beefy, unlike many steaks you buy at the supermarket. Just one dinner with this grass-fed beef and I'm convinced. It's more expensive at one time but cheaper by the pound if you buy locally and buy a 1/2 or full cow. Worth it!
Sunday, July 24, 2011
Mashed Turnips Are Amazing! And So Are Sweet Potato Chips
I don't think that I had ever tasted a turnip before tonight and they have just become my new favorite root vegetable. We have been steering clear of potatoes since going primal and I've missed them a bit. I was told that mashed turnips are a good substitute, so I thought I'd try them. I was also told that they don't taste like potatoes and to be prepared for them to be a little sweet. I'm not sure what I expected them to taste like, but they were awesome. I peeled them, chopped them and boiled them for about 20-25 minutes. Then (technically Eric did this) buzzed them in the food processor, added some butter, cream and salt and pepper. They were heavenly. Turnips have made their way onto my regular shopping list from now on. I served them with steamed asparagus and stuffed chicken breasts.
This weekend, we also tried sweet potato chips. Eric was wanting some nachos, but we don't eat corn so tortilla chips were out. After doing some searching online, he found that some primal folks like nachos made with pork rinds. So I ran to the store, bought some along with the sweet potato chips (cause I was hungry and they sounded tasty) and brought it all home.
Friday, July 22, 2011
Quick Tips for Cooking and Baking
I have spent a lot of time over the years bothering the internet with my problems when it comes to cooking and baking. I've looked up so many tips and tricks for getting my baked goods to turn out right, especially with regards to baking at high altitude. However, I tend to look the same things up over and over again because I forget. So rather than continue with that pattern, I figured I'd get all my helpful hints organized and posted here. Maybe next time I cook or bake and forgot an ingredient or rule for adjusting for the altitude, I'll remember that I've got all that info here on my blog. Maybe. More likely I'll forget about this post and look everything up again from the beginning. Here goes anyway. These are just general "rule of thumb" tips. Each recipe may need a bit of tweaking to get everything just right.
Substitutions:
Baking Chocolate: For each ounce of unsweetened chocolate use 3 Tbsp cocoa powder and 1 Tbsp saturated fat such as coconut oil or butter.
Bittersweet Chocolate: 1/2 ounce unsweetened chocolate plus 1 tsp to 1 Tbsp sugar for each ounce needed
Butter: Use an equal amount of coconut oil or lard
Buttermilk (for baking): Pour 1 Tbsp vinegar in measuring cup and add 1 c milk. Allow 5-10 min to sour.
Condensed Milk: For each 14 oz can needed, heat 1/3 c water, 1/2 c honey or maple syrup and 3 Tbsp butter to steaming. In heat-proof bowl whisk in 1 c dry milk powder. Allow to cool before using. Or, if you have the time, bring 6 c whole milk to boil, reduce heat and simmer 45 min, stirring occasionally. Stir in 1/4 c honey or maple syrup and continue to simmer 10-15 min more or until reduced to 3 cups. Strain through mesh strainer and refrigerate up to one week.
Cornstarch: For each Tbsp needed use 2 tsp arrowroot, 2 Tbsp flour, 1 Tbsp potato flour or 4 tsp quick-cooking tapioca. (Using arrowroot in a milk-based sauce will cause the sauce to have a slimy mouth-feel, so use potato flour for those applications.)
Corn Syrup or Molasses: Substitute local raw honey equally or use equal amount of sugar and increase liquid in recipe by 1/4 cup.
Cream of Tartar: Use an equal amount of baking soda
Flour:
- Baking - For each cup needed, use 3 oz almond meal and 1 1/2 Tbsp coconut flour
- Thickening - For each Tbsp needed, use 1/2 Tbsp arrowroot or potato flour
- Breading: Use an equal amount for almond meal
Half-and-Half: For 1 cup, use 1/2 c milk and 1/2 c heavy cream
Heavy Cream: Except for recipes calling for whipping the cream to either soft or stiff peaks, use equal amounts of regular coconut milk. Or use 2/3 c whole milk and 1/3 c melted butter for each cup needed.
Kosher Salt (coarse ground): For each tsp needed, use 1/2 tsp table salt
Maple Syrup: Use an equal amount of honey.
Sugar:
- Baking - For every cup needed, use 3/4 c honey or maple syrup, reduce liquid by 3 Tbsp and reduce oven temperature by 25 degrees F. (Honey causes baked goods to brown more quickly.)
- Cooking - For each cup needed, use 3/4 c honey or maple syrup.
Vanilla bean: Use 2 tsp vanilla extract for each whole bean needed.
High Altitude Adjustments:
For Denver/Boulder altitude - around 5280ft
Baking:
- Increase oven temperature by 15 degrees F and reduce baking time by 20%
- Reduce leavening by 1/8 to 1/4 tsp for each tsp needed
- Decrease sugar by 1-2 Tbsp
- Increase liquid by 2-4 Tbsp
- Whip egg whites to soft peaks rather than stiff peaks
- Thoroughly grease pans except when baking angel food cake
- Consider using XL eggs instead of L
- For cookies add up to 1/4 c flour
Cooking:
- Increase boiling/simmering time (water boils at lower temp)
- When making candy, reduce target temp by 1 degree F for each 500ft above sea level
- When deep-frying, decrease temp 3 degrees for every 1000ft above sea level
So there you have it. As I remember more tips or substitutions that I've needed, I'll update the list. Hope this helps.
Grain-Free Fudgy Brownies
Eric asked me to make brownies for him again, but the wasn't quite as impressed with the last batch as I was. So we tried the recipe from The Primal Blueprint Cookbook. I really wish we hadn't. They were awful! They smelled so good and looked pretty good, but they tasted nasty. So, we stuffed those down the disposal made another batch. They turned out wonderfully. We used Cook's Illustrated's Chewy Fudgy Triple Chocolate Brownies recipe and used almond and coconut flour instead of the regular flour. Not primal, but still grain-free.
5 oz Ghiradelli 86% dark chocolate
2 Tbsp coconut oil
8 Tbsp unsalted butter
9 Tbsp cocoa powder
3 large eggs
1 c brown sugar
2 tsp vanilla
1/2 tsp salt
3 oz almond flour
1-2 Tbsp coconut flour
Preheat oven to 350 degrees F. Line 8 x 8 pan with foil using the *sling method and butter the foil.
Melt chocolate, oil and butter together in double-boiler. Whisk in cocoa powder until smooth. Set aside to cool.
Whisk eggs and sugar together in small bowl. When chocolate mixture is slightly cooled, whisk egg mixture, vanilla and salt into chocolate. Fold or whisk in flours, using 1 Tbsp of coconut flour. If batter isn't as thick as you like, use the second Tbsp of coconut flour. (We used 2 Tbsp.)
Bake 35-40 min or until toothpick comes out with a few moist crumbs.
These will cut much better when they are cool, so try to be patient. If you can't wait, lift the brownies out of the pan with the foil sling and cut into 1" cubes. Or just top the whole thing with some vanilla ice cream and chopped nuts and grab a spoon.
*Sling method: Fold a 12 x 12 piece of foil into a 7 x 12 rectangle. Press into pan leaving a handle on either side. Repeat with a second piece of foil laid perpendicular to the first piece. Your pan will be completely lined and the brownies will lift out for easy cooling and cutting.
Sunday, July 3, 2011
We're Done Moving!!
We moved this week. Everything is finally at the new house and the old house is spotlessly clean. My family and I have been eating out for the last week and I'm so tired of it. I used to love going out to eat, but it's not so much fun when you really don't have a choice. And when your kitchen is so full of boxes that there is no way to get to the refrigerator or counter tops, you don't really have much of a choice when meal time comes around. And for a person who is trying to avoid grains, potatoes and excessive salt, it's difficult to eat out.
I'm so happy that we have unpacked our kitchen stuff, at least the cooking stuff. I still haven't found the plates, so paper will have to do for now. But at least I can start cooking again. We had some wonderful scrambled eggs this morning for breakfast. It may have been my favorite meal since last Sunday. I knew exactly what was in it and I knew for certain that it would be tasty. I was ecstatic.
Now that we're all moved and we have enough unpacked to have a functional house again, I'm going to be focusing my time (that isn't spent unpacking) on figuring out what I'm going to study in the fall. Eric and I were discussing it this morning and I had a bit of a revelation. Eric asked, "What is something that you could enjoy doing for 10 hours a day every day?" My answer: baking. I could spend every day baking up delicious treats for others and thoroughly enjoy it. I still really miss baking since switching to a Primal diet, even if I don't miss eating the results. So it is possible that I could be enrolling in pastry school in the fall. How fun would that be?! And I may actually learn how to bake a cake at high-altitude that doesn't fall and leave a big dent in the middle.
So that's all for now. Since my cookbooks are still all packed, I'll be searching the internet for recipes to cook. I'll post any winners. In the mean time, check out this recipe for Sweet and Salty Primal Trail Mix.
I made it last week so I could have an easy snack while I was packing. I just eyeballed everything, tripled the recipe and tweaked it to my liking. Here's about what I used:
1 1/2 to 2 c each walnuts, pecans, almonds, pumpkin seeds & sunflower seeds
3 Tbsp coconut oil
2 Tbsp vanilla
3/4 tsp cinnamon
1/4 tsp nutmeg
1 1/2 tsp salt
1/2 c honey
1 1/2 c dried cranberries & dried apricots, cut into small pieces
Instead of following the directions, I toasted the nuts for 7 minutes and then broke them into smallish pieces. I toasted the seeds for about 3 minutes. Then I tossed the seeds and nuts together. I melted the honey and coconut oil together in a small pan and stirred in the vanilla, cinnamon, nutmeg and salt. (I cut back on the nutmeg because I'm not a big fan of it.) I poured the honey mixture over the nuts and seeds, toasted it for another 5 minutes and then mixed the fruit in. It's absolutely delicious. I put it in my morning yogurt and cottage cheese (yum!) and just ate it right out of the storage container. I had to force myself to stop eating it when my stomach started feeling too full. Seriously, if I didn't practice self-control, I could eat the whole batch. In fact, our last batch is gone, so I think I'll make some more right now.
Update:
I followed the recipe this time to the letter, measuring everything. My first batch was SO much better. This last batch turned out too nutmeg-y and too salty. I prefer the first batch. I'll be going back to that "recipe."
Thursday, June 23, 2011
Lasagna With Zucchini "Noodles"
I have been meaning to get this recipe posted for almost a week now. Sorry it's taken me so long.
I was worried, while I was making this, that the kids wouldn't eat it. I shouldn't have worried. They all loved it. None of us missed the pasta noodles at all. I used my mandolin to slice the zucchini about 1/8" thick and layered it all just like regular lasagna. Unlike regular lasagna though, I had to use a sharp knife to cut it into pieces rather than just using the spatula. That was the only drawback and really, it's pretty minor.
Lasagna With Zucchini "Noodles"
4 medium zucchini, sliced lengthwise 1/8" thick
1 Tbsp olive oil
1 medium onion, diced small
6 cloves garlic, minced (about 2 Tbsp)
1 lb ground beef
1/2 c heavy cream
1/2 tsp salt
1/2 tsp pepper
1 - 28oz can crushed tomatoes
1 - 28oz can petite diced tomatoes, drained
24oz cottage cheese
2 eggs
1 1/4 c Parmesan cheese
1/2 c fresh basil, minced or 2 Tbsp dried
1/2 tsp salt
1/2 tsp pepper
1-1 1/2 c mozzarella cheese
Preheat oven to 375 degrees F.
In large 12" skillet or dutch oven heat oil over med heat. Add onions add cook 4 minutes or until just beginning to soften. Add garlic and cook 1 min more. Add ground beef to the pan and break up while browning. After 4 minutes, pour in cream and continue cooking until all the liquid has boiled away and just the fat is left. Add salt, pepper and canned tomatoes and stir to combine. Turn heat to med-low and allow flavors to meld while you prepare the cheese filling.
In a medium bowl, beat the eggs slightly. Add cottage and Parmesan cheeses, basil, salt and pepper. Stir together thoroughly.
Assembly:
Scoop about 1/2 cup of tomato sauce into the bottom of a 9 x 13 pan and spread it around. Arrange a layer of zucchini to cover the bottom of the pan. Spread 1/4 of the cheese over the zucchini. Top with 1 1/2 c sauce. Repeat these layers 3 more times, pouring the remaining sauce over the top. Place in the oven and bake for 45 minutes or until bubbly and the zucchini is soft. Remove pan from oven and turn oven to broil. Top lasagna with mozzarella cheese and broil until melted, brown and bubbly.
Allow lasagna to cool for 10-15 minutes before serving.
Variations on the same theme:
- I am making something similar tonight. It's more of a ratatouille than a lasagna and my husband called it "Ratatouille Lasagna." I didn't use the cheese and used Italian sausage instead of ground beef. I layered zucchini, yellow squash and eggplant with the sauce. I added the basil to the sauce since there was no cheese and baked it all together until it was soft. After serving, we topped it with a little goat cheese for a bit of tang. If you are not opposed to eating bread, a crusty baguette would be wonderful with this. Or maybe some rice.
- You could leave the meat out of the sauce and serve grilled salmon or chicken with the ratatouille version.
- You could add more veggies to the lasagna, such as spinach, mushrooms, broccoli or eggplant.
Friday, June 17, 2011
Almost Primal Chocolate Chip Scones
I found this recipe and just had to make it. I tweaked it a bit like I am apt to do these days to make my food more primal. I was hopeful, but still a bit skeptical about these. I've found many recipes for primal baked goods that got rave reviews. But when I tried them, they were horrible. (I'm a bit picky about my baked goods.) These were amazing. My kids gobbled them up in less than 5 minutes. I think that they'll become a breakfast staple at our house now.
Instead of using canola oil, I used coconut oil. I melted it and mixed it with the eggs, but it solidified in the eggs. So next time, I'll cut in the coconut oil like I would with butter. I used table salt instead of kosher, I just used half as much. I also used honey instead of agave nectar. I used mini semi-sweet chocolate chips because that's what I had on hand. They were a bit too sweet for my taste, so next time I'll use 1-2 Tbsp of honey if I use extra dark chocolate or just leave it out altogether, especially if I use semi-sweet chips again. These would be really good with wild blueberries and a bit of lemon curd too.
1-2 Tbsp honey
2 eggs, lightly beaten
1/4-1/2 c chopped 85% dark chocolate
Preheat oven to 350 degrees F. Line baking sheet with parchment paper.
Mix all dry ingredients together in a medium bowl.
Using a pastry blender or a fork, cut in solid coconut oil.
In small bowl combine eggs and honey. Pour into dry ingredients and stir with rubber spatula.
Stir in chocolate.
Using a spring-loaded ice cream scoop or two spoons, scoop dough onto pan.
Bake 15-17 minutes or until golden brown and a toothpick comes out clean.
Instead of using canola oil, I used coconut oil. I melted it and mixed it with the eggs, but it solidified in the eggs. So next time, I'll cut in the coconut oil like I would with butter. I used table salt instead of kosher, I just used half as much. I also used honey instead of agave nectar. I used mini semi-sweet chocolate chips because that's what I had on hand. They were a bit too sweet for my taste, so next time I'll use 1-2 Tbsp of honey if I use extra dark chocolate or just leave it out altogether, especially if I use semi-sweet chips again. These would be really good with wild blueberries and a bit of lemon curd too.
So here's how I'll make them next time:
Chocolate Chip Scones
(makes 8 large scones)
2 1/2 c almond flour
1/2 tsp baking powder
1/4 tsp salt
1/4 tsp cinnamon
1/3 c coconut oil1-2 Tbsp honey
2 eggs, lightly beaten
1/4-1/2 c chopped 85% dark chocolate
Preheat oven to 350 degrees F. Line baking sheet with parchment paper.
Mix all dry ingredients together in a medium bowl.
Using a pastry blender or a fork, cut in solid coconut oil.
In small bowl combine eggs and honey. Pour into dry ingredients and stir with rubber spatula.
Stir in chocolate.
Using a spring-loaded ice cream scoop or two spoons, scoop dough onto pan.
Bake 15-17 minutes or until golden brown and a toothpick comes out clean.
Thursday, June 16, 2011
The Cake Is A Lie!
For those of you who are not PC gamers, this scarf is a nod to Portal, a great game that my husband got me hooked on a while back. Portal 2 came out recently and I thought my dear hubby needed to have a scarf that say "The Cake Is A Lie." I had planned to give it to him before Portal 2 was released, but that didn't happen. I had been working on this scarf patter for about 9 months. I have started it and ripped it out so many times that I lost count. I tried fair isle knitting, but it ended up all bunchy and awful. I tried doing more of an intarsia technique and it looked worse than the fair isle. I finally decided that since in the first game, the cake was an illusion, an illusion technique would be perfect.
Once again, I started and ripped out the scarf many, many times. I just didn't like the way the alphabet fonts were knitting up with this technique. I ended up scrapping everything and tweaking an alphabet chart so it would work. And I think the scarf turned out wonderfully. It took me forever to make it and I'm so glad it's done. But, it is completely my creation, from inception to completion. I'm quite proud of it, even if I did finish it just in time for summer. When Eric wears in come fall, people are going to be amazed.
Sunday, June 5, 2011
Chucking The Grain Is Getting Tough
I am a baker. I love to bake all kinds of yummy creations and fill my house with the smell of something wonderful ready to come out of the oven. Since diving into the Primal lifestyle, my house has been devoid of all baked goods (with the exception of a few treats for end-of-the-year parties for the kids classes). I'm not going to lie, it's really tough for me.
Since going primal, I don't really crave sweets anymore. I used to "need" something sweet every day. These days, a few squares of a 77% Extra Strong Chocolove bar is too sweet and I have to pair it with some unsweetened almond butter. But I still want to bake and have those smells filling up my house. I've tried baking using coconut and almond flours in place of regular flour, but have had little to no success. It's rather disappointing. The baked goods smell good, but turn out like hockey pucks or with the texture of an omelet rather than a baked treat. Seriously, this is the only difficult part of the lifestyle change for me.
I've given up all breads and baked goods as a result of all my failed attempts at substitutions. Very sad for me, the compulsive baker. I don't always miss the bread though. I recently put my chicken salad into endive leaves and thoroughly enjoyed it. Even the kids loved it. They were inhaling the little bite-size morsels as fast as I could put them together. If the kids eat it, I call it a winner.
I've also had some other wins with primal cooking rather than baking recipes that I have posted on the blog that I share with my sisters. Feel free to check them out.
Since going primal, I don't really crave sweets anymore. I used to "need" something sweet every day. These days, a few squares of a 77% Extra Strong Chocolove bar is too sweet and I have to pair it with some unsweetened almond butter. But I still want to bake and have those smells filling up my house. I've tried baking using coconut and almond flours in place of regular flour, but have had little to no success. It's rather disappointing. The baked goods smell good, but turn out like hockey pucks or with the texture of an omelet rather than a baked treat. Seriously, this is the only difficult part of the lifestyle change for me.
I've given up all breads and baked goods as a result of all my failed attempts at substitutions. Very sad for me, the compulsive baker. I don't always miss the bread though. I recently put my chicken salad into endive leaves and thoroughly enjoyed it. Even the kids loved it. They were inhaling the little bite-size morsels as fast as I could put them together. If the kids eat it, I call it a winner.
Monday, May 16, 2011
Primal Fajitas
I made some fajitas for dinner the other night. It was sooooooo good. Since we're going primal, we didn't eat tortillas. At first I wondered what we would have with our steak and veggies. The answer: more veggies. Instead of heaping our fajita fixings into a flour tortilla, we put it on top of a big bed of mixed baby greens. Then we topped it like we would do with regular fajitas or a taco salad, with sour cream, fresh salsa and fresh guacamole. (Have I told you how excited I am that this diet lets me eat tons of avocado? I'm pretty ecstatic.)
It was fantastic. Really simple solution with super tasty results. Another option that I considered was using butter lettuce leaves in lieu of tortillas. I think that would have been just as tasty, but we didn't have any that night. *sigh* Next time.
So here are the recipes. The original recipe calls for using a grill, but it was raining and we don't like grilling in the rain. So I adapted it for the stove top. Enjoy!
Fresh Guacamole
3 medium avocados
2 Tbsp red onion, minced
1 small jalapeno, minced
1 medium clove garlic, minced
2 Tbsp fresh lime juice
1/4 c cilantro, chopped
1/2 tsp cumin (optional)
Salt and pepper to taste
Scoop out the avocado into a medium bowl. Smash with a fork until it is about half smooth and half chunky. Add the rest of the ingredients and mix together. Cover with plastic wrap and push it right onto the top of the guacamole. Refrigerate for at least 1 hour.
Fresh Salsa
3 medium tomatoes, diced small
1/2 c tomato juice
1 chipotle chile, minced fine
1 medium red onion, diced small
1 medium clove garlic, minced
1/2 c cilantro
3 Tbsp fresh lime juice
Mix it all together in a medium bowl and refrigerate 1 hour.
Fajitas (serves 8)
2 1/2 lbs flank steak
1/4 c lime juice
Salt and pepper
2 Tbsp coconut oil
1 very large onion, cut in wedges
2 large bell peppers, cut in wedges
Squeeze lime juice onto steak and season with salt and pepper, both sides.
Heat 1 Tbsp oil in a skillet over med-high heat until very hot. Add veggies and saute until just starting to soften. Remove from heat and transfer veggies to a large bowl.
Heat remaining oil in skillet. Add whole steak. Cook covered for 5 minutes on each side.
Remove steak from heat and transfer to a cutting board. Slice across the grain into thin strips. Return all steak, any juices that have accumulated and veggies back to pan. Saute until steak is cooked to your liking and veggies are heated through.
Serve with shredded cheese, sour cream, fresh salsa and fresh guacamole over mixed greens or use lettuce leaves for tortillas.
Friday, May 13, 2011
Losing weight!
Okay, so I wrote that last post about 5 days ago, but forgot to post it. So here's an update about the new diet.
I have lost 4 pounds since my weigh-in last week. 4 POUNDS! And that was only from changing my diet. I didn't really exercise since my weigh-in except for a couple walks because I was sick and then super busy. But I still managed to lose 4 pounds.
And here's the super exciting part: I wasn't hungry all the time. I ate as much protein and veggies as I wanted at meal times and grabbed a banana with almond butter for a morning snack and that was it. I had energy all day long, no highs and lows, just constant energy. I slept like the dead most nights and have been in a pretty good mood all week too. I'm in a great mood today since it was weigh-in time and I had lost weight.
I was pretty skeptical about this diet when we started and I kept track of what I was eating. I figured that there was no way I could lose weight without feeling half-starved all the time. And absolutely no possibility of losing weight when I was eating eggs and bacon most mornings. But it really does work. I've lost a total of 12 pounds in the last month. At this rate, I'll make my goal of losing 20 pounds before my birthday with plenty of time to spare. And that means I'll get my big reward (to be determined, I haven't figured out what it will be yet. If Eric meets his goal, he gets a big chunk of cash toward a $1500 bike. That's how big I'm talking.)
Gotta go get the little monsters from school. Oh, that reminds me. I didn't really think about it, but my kids have had more energy because they are doing this diet too. I hadn't considered that. They've been bouncing off the walls for a week. Time for some play time at the park, I think.
If you want to learn more about this diet, start here:
http://www.marksdailyapple.com//welcome-to-marks-daily-apple/
Time to Trim Down
Hooray, Blogger is working again!
So, it's no big secret: I'm a bit overweight. Okay, more than a bit. I've put on a lot of weight since Eric and I got married almost 10 years ago. (It'll be 10 years on May 19th!) We both have. I've been trying to watch what I eat lately, counting calories eaten and burned, cutting out the sweets (mostly), drinking LOTS of water and cutting back on my fat intake. I've been exercising between 3 and 6 times a week. I have been doing pretty well with the exception of a few cheat days and a week of being so sick I could hardly get off the couch. I lost 7 1/2 pounds in about 3 weeks, which is good. But, I haven't really been feeling better. I've been tired and feeling hungry and deprived most of the time. I have a goal of losing 20 pounds by my birthday and if I could stick to my plan, I could probably make it. However, I'm not sure I could continue sticking to that plan. I don't do well with deprivation. I tend to get to a breaking point, then I binge on junk and feel like a failure. Time to change tactics.
Eric and I watched Fat Head last week when I was sick. There was a lot of information in that film that made a lot of sense to me. And it got me thinking and asking questions:
1) Why has the government told us to eat a lot of grains as part of a healthy diet when animals are fed grain to fatten them up? Can't wrap my head around that one.
2) Is the abundance of gluten allergies these days occurring because our bodies aren't programmed to handle so much grain? Quite possibly.
3a) Are vegetable oils really "healthy" if they have to be chemically extracted from the vegetables? Doesn't sound right to me
b) And if it is so healthy, why can consuming said oils contribute to developing cancer? Again, seems like that goes against all logic. "Healthy food" shouldn't contribute to a person getting cancer.
Monday, May 9, 2011
Happy Mother's Day
I had a bit of a frustrating night on Saturday night. I went to bed annoyed and didn't sleep particularly well. When I woke up on Sunday morning, I really didn't want to be awake. I just wanted to stay in bed for the day.
My day got a lot better though. My wonderful husband told me to pretend to be asleep so the kids could bring me breakfast in bed. There was no need to pretend. I went back to sleep and it was great. Next thing I knew, Eric and the kids were bringing me my breakfast. Lizzy made me bacon. Joshua made me scrambled eggs. Jacob made me some toast with lots of butter. And Eric made me a mimosa and added some strawberries to the plate. I'm not sure who decided I needed cookies with my breakfast, but I gladly ate them. It was sincerely one of the best breakfasts I'd had in a long time. And of course one of the best parts about it was that I didn't have to do the cooking.
After breakfast, Eric and I played some cooperative Portal 2. Lots of fun. That game really makes you have to think to figure out the puzzles. Love games like that.
We had some quiet time. The kids stayed in their room, Eric fell asleep and I watched a movie and worked on my knitting project. Very relaxing. After quiet time, we all went for a long walk, almost 4 miles. The kids did pretty well considering it was a fairly warm day. Our destination was a Redbox kiosk at Walgreens to return and rent movies. We picked up a pack of Uno cards too. We ended up playing Uno until bath time and then it was bedtime for the kids.
It was a really good day. I know that, like most moms, I can get really fed up with and tired of my kids. But really, they are great kids. I love them. They are sweet, loving and smart, each one of them. I am grateful for them and a wonderful husband who keeps me from giving them away on my more stress-filled days. This Mother's Day was the best one I've ever had.
Thursday, May 5, 2011
Brown Butter Coconut Chocolate Chip Cookies
What? Is it possible to pack that much tastiness in one cookie? Why yes, it is. These are the most amazing cookies I've ever had.
I introduced my friend Debe to the Cook's Illustrated Perfect Chocolate Chip Cookie recipe a while back. Recently she informed me that she made them even better. I was skeptical. I mean, can you really improve on perfection. Apparently, you can if you add coconut. Now, I love coconut, but it never occurred to me to put it in chocolate chip cookies. That's mostly due to my obsession with following a recipe to the letter. (I'm a little OCD when it comes to following baking recipes.) I am so glad that Debe's not that way. It's one of the many reasons we get along so well. She pushes me to be more laid back with my recipes and I introduce her to lots of new and amazing recipes, which she goes on to tweak to her heart's content.
These cookies combine the nutty, toffee-like flavor of browned butter with toasted coconut and chocolate. If you like nuts, a cup or so in this recipe would not necessarily go amiss, (perhaps some macadamia nuts). I, however, will save my nuts for another recipe. I think trying to pack anymore goodness into these cookies would be a bit reckless and possibly dangerous, at least to my waistline.
The technique of browning butter can be used for any cookie recipes to add a little extra tastiness. So, next time you get a hankering for amazing chocolate chip cookies, something extra special, here's what you do:
Dig out your favorite chocolate cookie recipe. Take 3/4 of the butter and melt it over med-low heat in a skillet, about 2 minutes. Once it is melted, keep an eye on it. Butter can go from browned to burnt in a snap. Once it turns a light golden brown, 1-3 minutes more, remove it from the heat and add the remaining butter, allowing it to melt as well. Pour the melted butter into the bowl of a mixer and allow to cool a bit
While the butter cools, toast your coconut in a 350 degree oven on a baking sheet. Again, keep an eye on it. Stir it every 2 minutes until it is golden brown and toasted. Put the toasted coconut in the blender or food processor and pulse it until chopped fine.
Continue following the recipe, substituting coconut extract for vanilla and adding the toasted coconut with the flour. Bake as directed.
These are best right out of the oven, but if there are any that last until they're cool, store them in an air tight container. I don't know how long they'll keep since our batch only lasted 2 days.
Enjoy!
Fabulous Day of Amazing Food
Every now and then, my friend Debe and I get together and spend the whole day cooking. This last Saturday, we had a bit of a theme. We made Chipotle and Qdoba copycat recipes.
The recipes from chipotlefan.com all turned out wonderfully. The barbacoa beef was a bit lacking in flavor despite the marinade smelling so potent that it made me cough and my eyes water. Kind of disappointing.We used a Cook's Illustrated recipe for the salsa, which was pretty simple and straightforward.
The beans were a chore, let me tell you. I've tried cooking dried beans many times and it's always a crap shoot whether they'll turn out well or not. Most of the time, half of the beans are still rock hard while the other half of them are mush. The only way I've found to cook them with fairly good results is in the crock pot, but that takes all day and the results still vary. I decided that I'd start the beans the night before our cooking day and hope for the best. I started by doing a quick soak: covering the beans with water, bringing them to a boil and letting them sit for an hour. I let them sit overnight instead of just an hour. Saturday morning, I started them boiling on the stove again, simmered them for a couple hours, then put them in the crock pot when I got to Debe's. They cooked in the crock pot on medium for another 6-7 hours. They turned out really well. I guess the secret to cooking dried beans at high-altitude is just cooking the crap out of them. I'm not really sure that it was worth all the work though. I think next time I'll just open some canned beans and add some extra flavor or just cook them in the crock pot for 24 hours and be done.
Dessert was my favorite part. I made angel food cake with strawberries and whipped cream. It was my first attempt at making angel food cake. (It called for 10-13 egg whites, enough to measure 1 1/2 cups. No problem there, but what do I do with all the yolks?) It was delicious, so much better than the styrofoam angel food cake you buy at the store. It had kind of a marshmallow-y flavor and a spongy texture. So yummy. Debe made Cook's Illustrated Perfect Chocolate Chip Cookies even better by adding coconut! These were seriously the BEST cookies I've ever had! She substituted coconut extract for the vanilla and added about 1/2 cup toasted coconut in with the flour. They were amazing and didn't last long. I mean, can you get any better than browned butter chocolate chip cookies with coconut? I'm thinking, no.
It was a fabulous day.
We made guacamole,
fresh salsa,
The beans were a chore, let me tell you. I've tried cooking dried beans many times and it's always a crap shoot whether they'll turn out well or not. Most of the time, half of the beans are still rock hard while the other half of them are mush. The only way I've found to cook them with fairly good results is in the crock pot, but that takes all day and the results still vary. I decided that I'd start the beans the night before our cooking day and hope for the best. I started by doing a quick soak: covering the beans with water, bringing them to a boil and letting them sit for an hour. I let them sit overnight instead of just an hour. Saturday morning, I started them boiling on the stove again, simmered them for a couple hours, then put them in the crock pot when I got to Debe's. They cooked in the crock pot on medium for another 6-7 hours. They turned out really well. I guess the secret to cooking dried beans at high-altitude is just cooking the crap out of them. I'm not really sure that it was worth all the work though. I think next time I'll just open some canned beans and add some extra flavor or just cook them in the crock pot for 24 hours and be done.
Saturday, April 30, 2011
Pasta e Fagioli - Yum!
I found a copycat recipe for Olive Garden's Pasta e Fagioli soup years ago and have made it several times since then. I got a bit of a hankering for it and decided it was time to make it again. I doubled the recipe for the most part, but didn't have everything that I needed. So, I kind of tweaked it this time. I'm so glad I did. It turned out to be the best I had ever made.
Pasta e Fagioli (doubled, exactly how I made it this time)
This makes a HUGE pot of soup, you'll need at least a 5 quart pot to make the full recipe.
2 lbs ground beef
1 large or 2 medium onions, chopped
4 cloves garlic, minced
1/2 lb carrots, peeled and julienned
1/2 tsp celery salt
1 bay leaf
2 (14oz) cans tomato sauce
1 (5.5oz) can V8 juice
2 (15oz) cans petite diced tomatoes
2 (15oz) cans fire-roasted diced tomatoes
2 cans kidney beans with liquid
2 cans great northern beans with liquid
2 tsp white wine vinegar
2 tsp basil
2 tsp oregano
1 tsp thyme
1 tsp pepper
salt to taste
1 lb ditalini pasta
Brown the ground beef. Drain fat.
Add carrots and onions and saute for 10 minutes.
Add rest of ingredients except pasta and bring to boil. Reduce heat to low and simmer for 1 hour.
In a separate pot, boil pasta for 10 minutes and drain.
To serve, place pasta in bowl and ladle soup over pasta. Top with Parmesan cheese.
It's really best the next day. I know it's tempting to put the pasta into the soup before serving, but the pasta will soak up all the moisture from the soup and get mushy and unappetizing that way. Store them separately.
Tuesday, April 5, 2011
Another Not-So-Successful Attempt At Making Thai Food
Try as I might, I cannot get a Thai curry to turn out right in my kitchen. I'm not sure what I'm doing wrong, but there has to be something amiss. I've tried multiple different recipes, a couple different curry pastes, light coconut milk and regular coconut milk. I've tried a couple recipes from America's Test Kitchen/Cook's Illustrated recipes and even they didn't turn out quite right. What I'm looking for in a good curry is bright, complex flavor and mine keep falling flat. My most recent attempt was no exception.
I was really craving some good curry, so I bothered the internet with my problems and searched for a Thai red curry recipe. This is the one I tried. When my sisters and I went out for Thai food in Pittsburgh, we had an amazing red chicken curry with pineapple and red peppers. I was hoping that this one might come close to that one. Terribly disappointing. There was no flavor. At all. One would think that with all those different flavors combined, there would be some kind of complex flavor to it. There wasn't.
So I tried to doctor it a bit. I added a jalapeno to try to increase the heat to no avail. It was a fairly mild pepper. Therefore, I added a good bit of sriracha and that really kicked up the heat. I added more cilantro and a bit of mint hoping to brighten the flavor. That helped a bit, but not enough to make it as delicious as I wanted it. I added salt and pepper. Still really flat. By this time, I was pretty hungry so I decided to let it wait for another day. I served myself some of the flat curry over jasmine rice and lamented my bad culinary luck while I ate my late lunch. Perhaps I'll mess with it some more tomorrow.
Eric, my husband and guinea pig, suggested that I try a yellow curry. He didn't have the traumatic experiences (I may be exaggerating just a bit) with yellow curry that I had as a young child and he actually likes that stuff. (gross!!) I will never and I mean NEVER make yellow curry. I can't even handle the smell of it. So as much as I love my husband, he'll have to get his yellow curry from someone else.
So, if anyone out there in Internet Land has a wonderful Thai curry recipe, please, Please, PLEASE send it my way.
Saturday, March 12, 2011
Life Can Be So Crazy Sometimes
Seriously, can't everything just slow down every once in a while? Apparently not around my house. We've been sick and then better and then sick again. We finally have renters in our house. HOORAY and FINALLY! It only took 9 months of the house sitting vacant and having to pay our mortgage in addition to rent for our new house. I'll tell you, that'll stretch your finances pretty thin. Now it's time to do all the things that we've had to put off until there was money available.
I took a day off last week to de-stress a bit. It was nice, but not really a relaxing day. I dropped the kids off at school and then went shopping pretty much all day. I went to Borders here in Boulder. It's one of the many locations that is closing, so everything is on sale. I couldn't pass it up. Then I went to the local yarn store to buy yarn for a scarf I wanted to make for my mom for Mother's Day. It was my first time going to this particular store and it was a bit overwhelming. They had so many beautiful yarns. There was one hank of gorgeous yarn that I really wanted, but alas, it was about $65 for less than 200 yards. So rather than blow all my money on enough of that yarn to make something for myself, I eyed it longingly while I paid for the yarn for my mom's scarf. The yarn I bought was pretty great to though.
I spent the rest of the day shopping for a dining table. Our current table is awful. The kids have thoroughly destroyed it to the point of embarrassment. I have been putting off inviting the neighbors over for dinner because I'm ashamed of our horrible table. And the chairs aren't any better. If I'm ever going to feel comfortable having company over again, we are going to have to get a new dining set first. I didn't find anything that was quite what we have had in mind. My search will continue another day.
Sunday, February 27, 2011
Sucks to be Sick
I have been sick for a while now. I didn't realize how long it'd been since I'd blogged. I've had two boys (my husband and son) sick with congestion and bronchitis. Then I ended up heading to the doctor as well because I've been sick for over a month and can't seem to get well. All three of us sickies were put on the same medication, Zithromax. It is awful stuff. The package says that about 5% of people get upset stomachs from it, but all three of us did. I'm talking doubled over, cramping, so nauseated that you can't drink water and painful upset stomach. It lasted for about 20 hours after taking each dose of the antibiotics. Not fun at all. I took mine at night, so by dinner time each day, I could eat a little something. However, since it dries up all the congestion, it also made me quite dehydrated which prompted a pounding headache in the afternoons. And I couldn't drink much because even water would cause my stomach to cramp up more.
I took my last dose last night before bed. My doctor said that the nausea may last up to 48 hours after taking the last dose, so hopefully I'll be feeling better on Tuesday. I really hate being sick and a medication is supposed to help you feel better, not worse. In this case, the cure is definitely worse than the disease. Next time I'm just going to load up on Mucinex and Sudafed. Seriously, I feel like I've had a hangover for a week without the euphoric feeling of even a slight buzz. Sucks big time.
Now that I've gotten all that ranting out of my system, I'm going to crawl back into bed and pick up another knitting project. I'll blog about those when I can stand to look at my computer monitor for more than 10 minutes at a time.
Hope no one out there has to suffer through Zithromax. It's evil, pure and simple.
If I'm feeling better Tuesday, I'm going on strike and taking the day off. No dishes, no laundry, no cleaning, no cooking, no kids. I'm gonna take a long hot bath, get dolled up and head out. I'm taking the whole day for just me. No one relying on me for anything. Tuesday is going to be Shelly's Day of Me Time!
Wednesday, February 16, 2011
Shut the Front Door! This Curried Pumpkin and Chicken Soup is So Good!
I had my first good experience with Thai food this past September. My sisters and I had our annual get-together in Washington, DC and Pittsburgh this year and we went out for Thai food for lunch one day. The only Thai food I'd had before that was yellow curry that my mom used to make us eat. Now, my mom is a great cook, I always ate well when I lived with my parents. But yellow curry is by far the nastiest thing I've ever eaten and I refuse to ever eat it again. So when my sisters suggested curry, I was not excited. (Neither of my sisters would consider eating yellow curry either, by the way.) They assured me if I stayed away from the yellow nasty stuff (which my husband actually likes, gag!), I would like it. And I did, in fact I fell in love with it and have been craving more ever since. So every time I get the chance to make something with Thai flavors, I jump at it.
I've been sick for the last week and so has half my family. I made chicken noodle soup last Saturday, from scratch, even though I didn't want to do anything more than crawl into bed and sleep for a week. But if I hadn't made it, we'd have ended up eating toast and mac & cheese for 3 days. Not appealing. Every time I ate my soup, I was wishing that my kids would have been interested in this soup. Like most kids, mine are very hesitant to try new things, especially anything with complex flavors. My sister posted this recipe on our shared blog after she made it and raved about it. I was so jealous.
Well, today I finally gave in and made some. My fever broke yesterday, so I was feeling a bit better. But I was still feeling a little under the weather today. Then, instead of being about to go out to lunch with my wonderful husband for our weekly lunch date, my son Jacob got sick at school and I had to bring him home. I needed more chicken soup to deal with the sickness coming back, but my chicken noodle soup was gone. Today was the day to make some Thai chicken soup. And it was delicious. I'm hoping no one else will like it so I can have it all to myself.
I followed the recipe as closely as I could with what I had on hand. I didn't have the ingredients to make panang curry paste, so I used my red curry paste. I had chicken breasts in the fridge, so I used them instead of shrimp (although I love shrimp and think they would be wonderful in this recipe). I left out the lime leaves and the bird's eye chile too because I didn't have them. But everything else went into the pot and turned into quite a tasty creation. I ladled it into my bowl over some jasmine rice and savored every bite. I burned my tongue pretty badly because I wasn't willing to wait for it to cool down. So yummy. I would definitely recommend trying this recipe.
I think I'll add a bit of chile sauce to the leftovers for a little extra kick of heat. I like my asian food spicy and this wasn't spicy enough. All the other flavors were there, just not enough heat.
Sunday, February 13, 2011
Potato Gnocchi with Pear and Gorgonzola Cream Sauce
I went out to dinner with my family for my daughter's birthday last night. She chose to go to Olive Garden. (She always chooses Olive Garden.) Eric and I weren't very hungry, so we decided to split the Pear and Gorgonzola Ravioli. We substituted chicken for the shrimp because Eric doesn't like shrimp. It was good. I loved the flavors of the pear and the Gorgonzola cheese. I figured, I've got some ripe pears and a tub of Gorgonzola cheese in the fridge, I could make something like it at home. I've been meaning to try my hand at making gnocchi too. So, when I started getting hungry for lunch today, I knew exactly what I wanted to make.
I was surprised at how easy it was to make the gnocchi. I baked some potatoes, pulled off the skins, mashed them and added flour and salt. I kneaded it until it was a soft, smooth dough. Then, working with 1/4 of it at a time, I rolled it into a 1/2" log and cut it into 1/2" pieces. Once they were all cut, I gently rolled them down the tines of a fork and they were ready for the pot. You only boil them until they float, which took about 2 minutes. Super easy and it only took about 15 minutes once the potatoes were done baking.
Monday, February 7, 2011
Over-Cooked Oatmeal....Or Not
Today was a busy day. It started at about 6:30 and I was going about 5 different directions at once. I got the kids ready, took them to school, came home, started my oatmeal, looked up the current grocery ads, made a menu and shopping list. Then I remembered my oatmeal on the stove and freaked out. How could I have so completely forgotten about my breakfast simmering away on the stove?! For an hour and a half?! I was sure that my oatmeal would be ruined, burned to the bottom of the pot if not on fire. But I was wrong. It was just fine. How odd.
I tried steel-cut oats about 6 months back and decided that I enjoy them much more than old-fashioned or quick-cooking oats. Steel-cut oats take longer to cook and still have a bit of chewiness to them. The other two varieties, in my mind, produce inedible, mushy slop. But that's just my opinion. My family doesn't like the steel-cut oats (I guess they prefer mushy slop), so I only make them when I'm the only one eating oatmeal. I think my choice of steel-cut oats today saved my breakfast. If I had chosen old-fashioned or quick-cooking oats, I'm sure I would have found a disaster and possibly a ruined pot.
Except for needing a bit extra milk in it this time, my oatmeal was perfect. The oats still had a bit of chew to them and the starches thicken things up nicely. I think next time, I'll try cooking them longer and see if I can get them even softer, maybe overnight in the crock pot. I believe that's how Alton Brown does his. Maybe it's time to try it out.
Every once in a while, it's nice to have a happy accident in the kitchen.
Sunday, February 6, 2011
Bacon-Scallion Corn Muffins with Cheddar Cheese
Like the rest of the US, we've been getting a lot of snow lately. It all seemed to be melting yesterday morning, which made me very happy. I love the look of snow, but I hate having to go out in it. Then it started snowing again in the afternoon. It continued most of the night and I woke to a very snowy view out my window. My husband offered to make hot cocoa if I would go shovel the driveway. I countered with an offer to make breakfast and hot cocoa if he would shovel. I offered to make these yummy muffins and scrambled eggs. He ended up doing the shoveling.
These muffins are so tasty. They are a bit of a chore to make, but it's worth the effort every once in a while. And they are in no way low-fat.
Sorry I don't have any pictures of these, they were practically inhaled as soon as they came out of the oven.
Bacon-Scallion-Cheddar Corn Muffins
3 slices bacon, cut into 1/2" pieces
8-10 scallions/green onions, sliced
2 c flour
1 c corn meal
1 1/2 tsp baking powder
1 tsp baking soda
1 tsp salt
1/2 tsp pepper
2 c shredded sharp cheddar cheese
2 eggs
1/2 c sugar
8 Tbsp melted butter
1/2 c milk
3/4 c plain yogurt or sour cream
Preheat oven to 400 degrees. Line muffin pan with paper liners or spray with cooking spray.
Cook the bacon until crisp. Add scallions, cook 1 minute. Set aside.
Mix dry ingredients and cheese together in a large bowl.
Whisk eggs together with sugar. Slowly add melted butter while whisking.
Mix milk and yogurt or sour cream in large measuring cup. Slowly whisk into egg mixture.
Add bacon/ scallions to egg mixture.
Pour liquid into dry ingredients and stir gently with spatula.
Using a spring-loaded ice cream scoop, fill muffin pan.
Bake 18 minutes, rotating pan half-way through baking.
Let cool 5 minutes in pan.
Refrigerate leftovers and reheat before eating.
Tuesday, February 1, 2011
Orange Chicken with Broccoli and Rice
Confession: I put things in the freezer and forget about them. By the time I remember they are there, they're usually expired. While I'm trying to do better about this, it still happens from time to time. So when I remembered the chicken breasts I had in the freezer, I determined to use them...all of them.
I was going to make Chicken Tikka Masala, one of my favorite dishes lately, but my hubby was having tummy trouble and didn't want anything spicy. And really, what's the point of eating Indian food if it's not gonna have a kick of heat, right? So, I had to come up with something else before the chicken went bad in the fridge instead of the freezer.
I got out my handy-dandy iPhone and opened up the Cook's Illustrated app. I can always find a yummy sounding recipe there. I went through hundreds of poultry recipes and found Orange-flavored Chicken. Sadly, it called for deep-frying the chicken. I DO NOT deep-fry. I have had trouble with kitchen/grease fires in the past (I used to take a medication that made it very hard to concentrate and you need to be able to stay on task when frying.) and think it's safer for everyone in my house and the surrounding area if I abstain from deep-frying. Luckily, at the bottom of the first page of the recipe, there was a link to an oven-baked version. Perfect! I can bake, easy-peasy.
Thursday, January 27, 2011
Roasted Peanut and Dark Chocolate Cheesecake!
I checked my blog today, looking for this recipe, and was shocked that I had forgotten to post it. I have been savoring every bite of this thing for almost two weeks now and I didn't post it! I'm so sorry that the few people who read my blog have been deprived of this recipe for so long. It really is inexcusable. My heartfelt and humble apologies to all of you.
So this recipe was inspired by my lunch with Eric at Centro a couple weeks ago. The Centro Roasted Peanut and Dark Chocolate Torte was better than this cheesecake, but this recipe was a pretty tasty starting point. I even had some friends try it and got their feedback, which helped me tweak the recipe for the better, I think.
Wednesday Lunch Date at Jill's
Eric and I went to Jill's for lunch yesterday for our weekly lunch date. The atmosphere was okay and so was the food, but it wasn't great. Eric had the Cuban panini with sweet potato fried and I tried the chicken ravioli. The ravioli tasted okay. The presentation was pretty, but the flavor was a bit lacking. When Eric tried it, he said it tasted like hot dogs. And it kinda did. The best part of the lunch was Eric's sweet potato fries. Those were yummy. Everything else, I could have done without.
I think that the thing that bothered me the most was that when I left the restaurant after finishing my "meal," I was still hungry. I'm not usually a lunch eater. Most days when I'm home alone, I tend to skip lunch. But I left this restaurant hungry, at lunch time. Not a good recommendation in my mind. I may go back and give it another try sometime, but not any time soon.
Thursday, January 20, 2011
Apple-Cinnamony, Warm-You-from-the-Inside-Out Oatmeal
We got some snow last night. Enough to make driving a huge pain in the hind-end, but not enough to close schools. I figured that everyone needed a warm breakfast. The kids laid claim to the last of the eggs, so Eric and I had to come up with something else. We had some muffins that I bought from Costco, some apple muffins with maple icing and some double chocolate ones. What besides eggs would go well with them? Oatmeal. Since I have decided to try to lose a few pounds, I wasn't going to have a muffin, but the apple cinnamon flavor sounded so good this morning.
The result of the craving for that apple flavor was Apple Cinnamon Oatmeal. Unlike most of my creations, this one came right out of my head, no real measuring, just eyeballing everything. And it was delicious!
Here is how I threw it together:
Peel, core and chop one large Fuji apple. I chopped mine into about 1/4" x 1/2" pieces. Heat a large sauce pan over medium-high heat. Add about 1 tsp of unsalted butter. When the foaming subsides, add the chopped apple. Cook the apple until the liquid has cooked away and the apples start to slightly brown. Sprinkle in about 1 1/2 Tbsp of cinnamon sugar, 1/4 tsp cinnamon, a pinch of fresh nutmeg and a pinch of salt. Continue cooking until everything looks sticky and caramel-y. Hit it with 3-4 Tbsp of Applejack Brandy and boil it down until it is thick and syrupy. Add 1 1/2 cups of old-fashioned oats and 3 cups of water. Bring it all to a boil and lower the heat to medium-low. Boil, stirring occasionally, for 5 minutes. Add brown sugar to taste (I used about 1 packed tablespoon) and serve. This serves 2-3 people.
This oatmeal was pretty amazing. I think next time I make it, I'll cut the oats back to 1 cup and the water to 1 3/4 cups so that there is a bit more apple flavor. Still, a pretty great breakfast for about 10 minutes of work.
If you don't have any Applejack on hand, try using about 1/4 - 1/2 cup of apple juice or 3-4 Tbsp of apple juice concentrate. It may end up a bit sweeter, but you can just cut back on the amount of brown sugar that you add at the end.
Enjoy!
Tuesday, January 18, 2011
Going Simple with Inside-Out Burgers
So Eric got the idea to make hamburgers with all the cheese and bacon and yummy stuff on the inside. He tried it while I was at my Monday night meeting a couple weeks ago so, sadly, I missed out. We had another go with them last night and I was so excited. I tried to stretch one pound of beef into five burgers, and they turned out well, but they were a bit to small for their buns. Next time I'll used two pounds and make them a bit bigger. I had bacon, blue cheese and grilled onions in mine. (Had HUGE flavor!) I was going to have jalapenos on mine as well, but since Eric wasn't having any, I chose to skip them. I wanted him to spend time with me after dinner, and that's easier to do if you both have dragon breath. Either way, I was so psyched! It was truly one of the best burgers I'd had in a very long time. I think that the organic ground beef had a lot to do with that. There is such a huge flavor difference between vacuum-sealed organic beef and the stretch-wrapped hormone-filled beef that you buy in the little foam trays. The organic beef usually costs about twice as much, but for something like burgers, the extra expense is SO worth it. We like our burgers medium to well done and with the organic beef, they still turn out juicy and tasty. I think these tasty morsels are going to find their way into our regular rotation of recipes. Definitely worth the extra time and effort.
There really isn't a recipe for these, but I'll tell you how we put them together. Divide your ground meat up into as many portions as you plan on making. Divide each portion in half and press the meat thin to make two patties. Condiments such as mayo, ketchup and mustard still go on the bun, the cheese, bacon, onions, peppers, etc. go between the patties. Place your favorite burger toppings on the first patty and top it with the second patty. Cook the patties as you would a regular burger. They are so yummy.
Thursday, January 13, 2011
A New Food Adventure
My husband and I got to lunch together every Wednesday. We used to debate about where to go, what's good, what we were in the mood to eat. Instead of keeping with that pattern, we have decided that we are going to visit every restaurant in the downtown Boulder area. We started at the West End of town and are systematically working our way east. Although there are many restaurants we have already tried and really liked, we're skipping them for this adventure. It will probably take at least 3 years to complete this goal, but by the time we're done, we'll know downtown Boulder's restaurants really well. Of course there are some restaurants that are only open for dinner. I suppose we'll have to find a babysitter so we can try those ones. I'm pretty sure we'll both be okay with that.
We started last week with Sushi Tora. It was really good. I had the sushi lunch and pork shumai. Everything was very tasty. Then, even though we didn't have room for it, we split the apple dessert. It was kind of like an apple crisp without the oats and was topped with really good vanilla ice cream. It was so delicious. I really liked this place. Partly because of the food and partly because of the atmosphere, very relaxed and comfortable. And since the servers leave a pitcher of water on the table, I always had a full glass. That's a very big thing for me. When I go out to eat, I can easily drink an entire quart of water and still need more. Sushi Tora gets a big thumbs up from me.
This week, Eric and I tried Centro Latin Kitchen and Refreshment Palace. It was pretty good. We arrived just after they opened, so it was pretty empty still. Again, water pitcher was left on the table and quickly replaced when it was emptied. Centro has a nice atmosphere and friendly staff. Eric and I split an Empanada Platter and the Chicken Enchiladas. They were both tasty, but not the best I've ever had. I think my favorite part of the meal was the achiote rice. It was so good. I could have eaten just that and been satisfied. But then came the dessert. We split the Roasted Peanut and Dark Chocolate Torte. (My mouth is watering just thinking about it.) It was amazing! Creamy roasted peanut flavored filling with a cheesecake texture on a blond cookie crust, topped with a thick, dark chocolate fudge layer, sprinkled with roasted peanuts and covered in whipped cream. If that isn't the epitome of decadence, I don't know what is. It was like a gigantic peanut butter cup but a thousand times better. I've come up with a recipe that I think might work to replicate this dessert, but I still have to try it out. If it turns out well, I'll post it right after I'm done eating way too much of it in one sitting. If it isn't up to snuff, I'll just have to keep trying until I get it right. *sigh* The daunting tasks that I set for myself, but I'll power through somehow. Not sure I can say the same for my waistline though.
Harper's Baby Blanket
I finished my newborn niece's baby blanket. I got it all blocked and everything. It's been forever since I've blocked a blanket, but this one needed it. It was only about 2/3 the final size before blocking and didn't look quite as nice as I had hoped. Once it was blocked, it looked just like I had imagined when I started it. And it was an easy pattern too. Those are my favorite patterns, easy to make and beautiful when they're finished.
Tuesday, January 11, 2011
Tuscan White Bean Soup
I love soup. At times, when I get on a soup kick, my family can really get fed up with how much I love soup. I grew up eating soup all the time. Soup, chili, stew, all kinds of brothy concoctions. So I think that has something to do with why I love soups so much; to me, soup is comfort food. Another reason: they can be so dang easy to throw together that soup is a great meal for a busy weeknight. Chop up and brown some onions, maybe some carrots and celery and meat of some kind, add broth, salt, pepper and herbs and let it simmer for a while. How easy is that?!
This recipe is so easy that I got it done in about 45 minutes, start to finish. And most of that time, I was just waiting around, getting hungrier and hungrier as it started filling my kitchen with wonderful aromas. I adapted this recipe from a Cook's Illustrated recipe. (Again.) I do that a lot, take one of their recipes and add my own little something. Here's how I tweaked it:
The CI recipe called for pancetta, I opted for Italian sausage instead. I used a local brand that was flavored with Merlot, Asiago cheese and sun-dried tomatoes. I figured that would be a tasty substitute, and it was. I could have used bacon, but this sausage sounded so yummy that I couldn't pass it up. I also added a big chunk of Parmesan cheese rind that I had in the fridge, about 2 cups of homemade chicken stock and an extra can of cannellini beans. I had some dried out french bread laying around from a few days ago, so we cut it into hunks and put it in the bottom of our bowls. I think that was my favorite part. The bread soaked up the flavorful broth and got all soft and chewy again. It was delicious! Definitely going to make it again. Already bought the ingredients.
A few days after the leftovers (sadly) were gone:
I made the soup again when I was at a loss as to what I was going to fix for dinner. This time I used only 1/2 pound of the same sausage but removed the casings and broke it up while I browned it. The first batch had too many BIG pieces of sausage, this time it had more pieces, but less sausage and therefore less fat. I also used 2 sprigs of Rosemary, a pinch of red pepper flakes and about 3 1/2 cups of chicken stock. The day after I made the soup the first time, it was too thick from the beans releasing their starches into the broth. I off-set that this time by adding a little more chicken stock at the beginning, rather than having to thin it down the second day. I decided to take the time to skim the fat off of the top of the soup while I simmered this time too. Removing the casings seemed to allow a lot more fat to float out into the soup. I can't stand to see fat floating on the top of my soup. If you're the kind of person who doesn't mind it, you can skip this step. But I was feeling rather anal that day and felt the need. All of my new tweaks worked well.
So here's the tasty, yet simple recipe. Sorry there aren't any pictures. I was so impatient to eat it, I forgot to snap a picture.
Almost Cook's Illustrated Tuscan White Bean Soup
1/2 to 1 lb Italian sausage links
2 Tbsp olive oil, if needed
1 med onion, chopped
1 Tbsp chopped garlic, about 3-4 cloves
3 1/2 c water
2 1/2 to 3 1/2 c chicken stock
5 - 14oz cans cannellini beans, drained and rinsed
1-2 sprigs Rosemary
Parmesan rind, about 3-4" piece
day-old French or Italian bread
In a large stock pot, brown sausage links. (Alternately, remove the casings and brown sausage. Leave in pan while browning onions.) Remove from pot and set aside.
Add oil to pot if there isn't enough fat from sausages. Saute onions until soft.
Add garlic, cook for about 1 minute, or until it is fragrant.
Dump water, stock and beans into pot. Put sausages back in along with Parmesan rind and Rosemary
Bring to a boil over medium-high heat. Lower heat to medium-low and simmer until sausages are cooked through, about 15-20 minutes. (Chicken or Turkey = 160-165 degrees, Pork = 170 degrees)
Remove sausage links, slice them into rounds and return to the pot. (Skip this step is you browned the sausage without the casings. Instead, skim fat off of the top of the soup.)
Let simmer for 5 more minutes.
Season with salt and pepper, remove Parmesan rind and Rosemary.
Place a chunk of dry bread in bottom of bowl and ladle soup over the top.
Serving suggestions:
- Drizzle with good extra virgin olive oil and balsamic vinegar for a little extra yummy-ness.
- Grate Parmesan cheese on top
- Smash up some of the beans for a thicker broth
Subscribe to:
Posts (Atom)