I had a very nice Christmas this year, despite the kids enthusiasm for opening presents at 5am. I'm not an early riser by any stretch of the imagination and get quite cranky when awakened that early, Christmas morning or not. Thankfully, after opening presents and having breakfast, I was able to take a long nap and wake up feeling much more pleasant. Of course by then, half the day was over. But that's what the holidays are for, right? Sleeping a lot, relaxing and having a good time doing as little actual work as possible. Am I way off in that assumption?
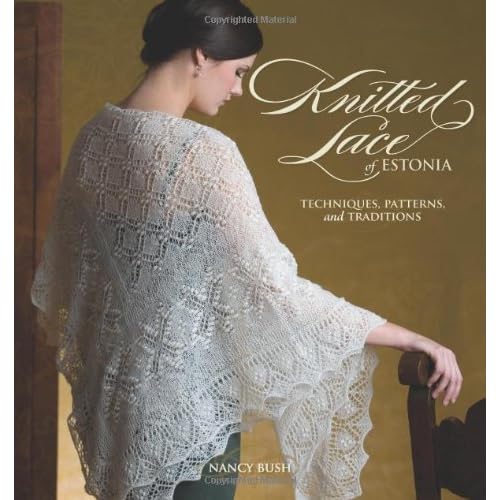
One of my favorite gifts this year was this book. I have been wanting it for a while, but couldn't justify buying it for myself with Christmas right around the corner. And I really hoped that I would find this under my tree on Christmas morning. And thanks to my mom and dad, I did. It came with an instructional DVD too!
A couple years ago, I became obsessed with the idea of knitting lace. My mom, mother-in-law, and two of my sisters-in-law have since received knitted doilies from me and I have another finished to keep for myself. (The largest of which ended up being 33" in diameter. Seriously, it's huge.) I love lace, always have. Doilies are beautiful and everything, but you'd look pretty odd wearing one around town. And now that I have this book (along with a couple "hint" notes from my mom inside), I can make myself (and my mom, apparently) some beautiful lacy shawls to wear too.
There's just something special about hand-knit lace, in my opinion. It is intricate and delicate and takes hours upon hours to complete. If someone gives you a lace garment or doily that they have knit themselves, you know that they put a lot of thought and work into it. You know that it wasn't just a last minute thing. Hand-knit lace gifts mean someone holds you in very high esteem. And knitting something lacy for yourself is the highest of knitted indulgences, one I plan on experiencing soon.
Now the only problem is, which pattern do I knit first? They are all so lovely that I'm having a difficult time deciding. Perhaps the best way to go is to start at the beginning of the book and just work my way through it. For now, I think that will be the plan.
Thursday, December 30, 2010
Saturday, December 25, 2010
Cheddar-Ranch Cheese Log With Bacon and Pecans
I make a cheese ball every Christmas. I used to make the Lion House Cheese ball recipe, but have decided to branch out the past few years. This year I was searching the internet for a new recipe and came across one that sounded pretty good. It called for two bricks of cream cheese, a package of ranch dressing mix and 1 1/2 cups of cheddar cheese. It sounded good, but I thought I could make it a bit better. Now what would work well with ranch dressing and cheddar cheese? BACON! I thought, "I mix it all together and roll the ball in bacon." But then I realized with the saltiness of the cheese and ranch dressing mix and the crackers with which I was going to serve the cheese ball, it would probably end up too salty.
Pecans or some other kind of nut is the typical coating for cheese balls, so I still wanted to use them. I thought I could sprinkle bacon on the top after rolling the rest of the ball in nuts. That seemed too tedious and there wouldn't be bacon flavor over the whole ball. My husband, Eric, suggested that I mix the bacon and nuts together before rolling the ball in it. That was my solution.
My other concern was that no one wants to eat the middle of the cheese ball. It ends up tasting bland and lacking that extra kick from the nuts, and in this case, bacon. The simple solution: make it a log instead. It worked like a charm. Every bite had nuts and bacon-y goodness. The consensus was that it is by far the best cheese ball/log I've ever made.
Saturday, December 18, 2010
Peanut and Almond Brittles for Christmas
I only ever think about peanut brittle around the winter holidays. I don't know why, it would be delicious all year round. There's just something about peanut brittle that says Christmas to me. The same is true for fudge, congo squares, Ritz crackers and peanut butter sandwiched together and dipped in chocolate, spiced nuts, peanut blossom cookies and cheese balls. I tend to gain about 10 pounds between Thanksgiving and New Year's Day every year because of all of the food that I only make around this time of year. Perhaps, if I were to make these "holiday treats" more often throughout the year, I wouldn't put on holiday weight. But alas, I'll never know. Traditions are traditions and I think I'll keep mine.
I was sitting at home after volunteering at my kids' school in the morning and it hit me that I had forgotten to get any kind of Christmas gifts for the kids' teachers. Peanut brittle automatically came to mind. Who doesn't love the crunchy, caramel-y candy studded with salty peanuts? I don't know of a singe person. And I remembered that I made a killer batch of the confection a couple years ago about which my friends raved. That's what I would make for the teachers this year.
Friday, December 17, 2010
Teddy Is Ready to Cuddle
I finally got Joshua's teddy bear done. All the pieces turned up, were sewn together and stuffed. I'm not going to lie, I'm relieved that this knitting adventure is finally over. It was, by far, the most complicated gift so far, truly a labor of love. Why, you ask. The yarn is a pain in the butt to use and the fibers make it almost impossible to see what you've knit and even more impossible to try to pick out seam stitches. Therefore, I have decided that I do not like working with Fun Fur yarn. Unless specifically needed for a project, I will not be using it again.
Animosity toward Joshua's choice of yarn aside, I think this little guy turned out alright. In the world of mass-produced, perfectly-sewn-together bears, he may look like an in-bred cousin who is missing a few marbles (crooked head, eyes that disappear behind fur, flat and misshapen nose), but I think Joshua will love him anyway. He's fat and cuddly and soft. And really that's all a kid needs in a teddy bear. And if he will scare away bad dreams in the middle of the night, even better.
Tuesday, December 14, 2010
Boy, Am I A Slacker!
I haven't posted anything in over a week. Certainly not because I have been at a loss as to what I should post. I simply haven't found the time. So here's a simple one, since I have about two minutes to post it before my kids find me again.
My husband loves s'mores. I'm talking L-O-V-E loves them. And we have worked out the perfect way to make a s'more. We've made s'more brownies and s'more nachos, but nothing comes close to being as satisfying as a plain, old s'more, made perfectly.
Made this way, the marshmallow gets perfectly browned without burning, the graham crackers get warmed and slightly toasted and the chocolate ends up completely melted. What more could one ask for? So, here's the secret. Feel free to pass it along to everyone, because really, everyone deserves the chance to eat the "perfect" s'more.
The Perfect S'more
2 graham cracker squares
2 large marshmallows
1/4 of a Hershey bar
Preheat your broiler right before assembling your s'more ingredients.
Line a baking sheet with foil for easy clean up.
Place the graham crackers on the baking sheet.
Smash the marshmallows so they are fairly flat, the brown more evenly that way.
Place in oven, 6-8" away from broiler heating element. Keep an eye on these, they brown pretty quickly.
Remove from oven, flip marshmallows over and toast the other side. (Very important step.)
Once the second side is lightly browned, remove from oven. Immediately press the chocolate into one half of the s'more. Top with the second half. Wait about 30 seconds, giving the chocolate enough time to completely melt.
Eat with reckless abandon. These are so messy and wonderful that you'll feel like a kid again when you eat them. Marshmallow and chocolate will ooze out and run down your chin and fingers. These are the epitome of happiness and there is no way to keep from grinning like a fool while eating them.
Sunday, December 5, 2010
Two Sweaters Down and a Teddy Bear to Go
Christmas is getting ever closer and I am hurrying to get ready. I took my son in to the pediatrician's office on Thursday with a rash and we came home with the flu. Not so much fun, for either of us. We spent all day Friday curled up in my bed watching TV while I finished two of my three unfinished Christmas gifts. I didn't think I had time to be sick, but it turned out that it was pretty handy to have an excuse to sit and finish my projects.No doubt they would still be sitting in my knitting bag in pieces if I hadn't been sick.
My mom gave me a book of sweater patterns for kids a while back and I hadn't used any of the patterns yet. So I decided I'd get it out and make the kids some sweaters for Christmas this year. Jacob, my youngest by one minute, insisted on the color baby blue for his sweater. I tried to talk him into something a bit darker, but he would have none of it. It had to be baby blue. So I cast on and started knitting his baby blue sweater. He chose a beautiful cabled sweater pattern. I L-O-V-E cables. They take longer to knit than a flat or textured sweater, but they are worth it. I think it turned out rather well too. And although I think it would look a bit better in a darker shade of blue, Jacob will be getting exactly what he asked for for Christmas.
Thursday, December 2, 2010
My New Fingerless Mitts
I have been working on knitted Christmas gifts for my family for a couple months. I have poor circulation in my hands and they have been getting really cold now that the weather is getting chilly, so I broke out my old fingerless mitts. They are worn, stretched out and baggy and not all that comfortable, but I keep them around anyway. I realized that the only reasons I've kept them this long is because I haven't found a pattern that was quite what I wanted and I haven't taken the time to come up with my own pattern. I decided it was time to make myself some new ones that actually fit and were comfortable to wear. I had some yarn left over from my husband's scarf with the proper size needles stuck right in the skein waiting for me to create something. So, I picked up the needles and cast on. It took me multiple attempts to get the size right and figure out the thumb gusset, but I finally got it right.
These fit like a dream. They are ribbed so they fit snugly but can stretch to fit larger hands. They cover my palms and wrists to keep them warm, leaving my thumb and fingers free to grip my needles while I finish my other knitting projects. And they are thin enough to be tucked under a long shirt sleeve. I absolutely love them and don't know why I didn't make them until now. Everyone needs a pair (or five) of these.
Subscribe to:
Posts (Atom)